Wednesday, February 20, 2008

The Principles of Beautiful Web Design Free Download


I fund this great book "The Principles of Beautiful Web Design" it,s not exactly about photo but has a section about colors that can be really helpful. Hope that you can find it useful.
If you are squeamish about choosing colors, feel uninspired by a blank browser window, or get lost trying to choose the right font, this book is for you. In it, I take a methodical approach to presenting traditional graphic design theory as it applies to today’s web site development industry. While the content is directed toward programmers and developers, it provides a design primer that will benefit readers at any level.

This book will show you how to:

* Create amazing designs from scratch.
* Understand why some designs just “work.”
* Unleash your creative talents.
* Master the design fundamentals: layout, color, texture, typography, and imagery.
* Uncover the trade secrets the great designers keep to themselves.

…and much more. Far too many things to mention here!

About the author:
“Jason the Designer Man,” as one of his coworkers once called him, dual-majored in graphic design and digital media at the University of Central Florida. When he’s not working on websites, he enjoys disassembling electronics and using them in his artwork. Jason writes about his adventures in design and technology on his personal site, jasongraphix.com.


You can download it for free here

“You don’t need to go to Art School to design great looking web sites!”

Tuesday, February 12, 2008

60 Sources of Inspiration for Photography

Are you struggling for new ideas? Do your creative batteries feel as flat and lifeless as a skunk in the fast lane?

Here are 60 ways to breathe new life into your love of photography and re-energize your inspiration.

1. Play with Photoshop
So much of photography these days happens after the shutter release has been pressed. There’s probably a ton of things that you don’t know how to do in Photoshop. Learn something new and see what that does for your photography potential.

2. Read the Manual
It’s not just Photoshop that can do all sorts of things that you don’t know about. Your camera probably has more settings and functions than you know… or know what to do with. You might find a lot of new ideas in the middle of your camera manual.

3. Watch a Movie
Manuals are all well and good, but movies have cinematographers too. There’s not much you can’t learn about landscape photography by sitting back and watching an old Sergio Leone film.

4. Read a Newspaper
Or you can be a little more intellectual and read a newspaper. The Sunday magazines have the best photos but the work by the staff photographers can be great models for creating striking images for amateurs as well as for photojournalists.

5. Visit a Flea Market
Strange objects mean strange shapes, odd shadows and plenty of potential for unique compositions. And you don’t even have to buy anything.

6. Shop at a Farmer’s Market
You never know what you might find at a flea market. At a farmer’s market, you know you can find colors, spheres, people and displays. And dinner too.

7. Check out Some Wedding Photojournalism
It might not be the sort of thing that your clients expect, but the images on display at the Wedding Photojournalist Association’s website might get you thinking about brides and grooms in a whole new way. Instead of the posing and the tripod, you’ll get to blend into the crowd and document the scene. It’s a whole new skill and it could give your wedding photography a whole new lease of life.

8. Hit the Water
You don’t have to be a scuba diver to shoot underwater images. You just need waterproof housing and access to the sea, a swimming pool or even a pond. And once you’re wet, don’t forget to look up as well as down. Some of the most inspiring images can be taken at the point where the light hits the surface of the water.

9. Hit the Streets
There’s a good reason that street photography is so popular: there are so many good things to shoot there. If you haven’t been photographing roads and crowds, give it a go. And if you have, try a different road.

10. Join a Demonstration
Demonstrations are full of flags, banners, placards and crowds. You can lose people in the mass or pick out expressions in the crowd. The only cause you have to support is photography.

11. Watch a Sports Event
The pros have it easiest at sports events with prime positions and lenses longer than your arm. But you can still try something new at your park on a Saturday afternoon.

12. Visit the Zoo
It might not be as thrilling as a Kenyan safari, but a zoo still has the sort of photographic subjects you can’t find anywhere else. Of course, you don’t have to try to squeeze your lens between the bars. Shooting the kids in awe at the monkeys can create some interesting images too.

13. Shoot Fast at a Race Track

Photography: joel.weismann

Race tracks also give you an opportunity to use a new technique: speed. Fast cars and a faster shutter speed can make for some inspired shooting.

14. Visit an Exhibition
Obvious, really. And yet so often overlooked. Any decent-sized town is likely to have at least one photographic exhibition on at any one time. Take in yours and see what the top photographers did to get on the wall.

15. Browse Google Images
You don’t even have to leave the house to find inspiring images though. Toss keywords into Google Images, admire the good photos that turn up and ask how you would have improved the poor ones.

16. Join Flickr Groups
The pictures in Flickr Groups are great places to see what other people are doing with a theme; the discussions are great places to find out how they did it. And you’ll probably find that the feedback you get on your own photos will give you plenty to think about too.

17. Just Step Back and Watch
For children’s photographers in particular, there can be a temptation to just dive in and get the photos. Sometimes though, lowering the lens, stepping back and watching the subject can reveal whole new sides. That’s true for portrait photographers, wedding photographers, animal photographers… in fact just about any photographer!

18. Roam the World with Flickr Maps
Flickr Maps might be a bit slower than Google Maps, but it comes with Flickr Images built-in. Choose a part of the world with interesting topography and see what photographers have done with it.

19. Change your Angle
Most people shoot an object by placing the lens right in front of it. When David Rubinger lay on the floor to shoot up at paratroopers in front of Jerusalem’s Western Wall during Israel’s Six Day War, he created an iconic image. What would you create?

20. Change your Time
Find yourself shooting at the same time of day each weekend? So break a habit. Discover what the light at dusk, mid-afternoon or early morning can do for your ideas. And it’s not just the light that can make the difference here. Just breaking your routine can often be enough to give you a new perspective and a whole new way photography habit.

21. Browse Stock Sites
You don’t have to be a buyer to check out the images on stock sites. You can be a professional photographer looking for ideas too… especially ideas for commercial images. And the searching is simple. Looking at the top-sellers will give you a good idea of what the market is buying, and browsing by category will show what other photographers are doing with their themes.

22. Write a Blog
Darren Rowse, over at Digital Photography School, mentions how much just writing about photography has helped to improve his picture-taking. It doesn’t matter if no one reads it; just putting your thoughts on the page could give you some new ones.

23. Read a Blog
Of course, reading a photography blog is even more inspiring thing than writing one. Not only can you learn what went into a photo and where the idea came from, you can also discover how to sell it. But then we would say that, wouldn’t we?

24. Buy a Photography Book
You can never own too many photography books, and each one you buy should give you a bunch of new ideas. Although that’s true of both books of photographs and books about taking pictures, you might find that photography guides give you more inspiration than a collection of images. The former will give you techniques to try out, while the latter will show you the techniques the greats have used. Stil, if you’re really stuck, go shopping.

25. Browse a Bookstore
Or save your cash, take a pile of book to the store’s cafĂ© and sit and enjoy yourself. In fact, you don’t even have to take the photography books with you. Even the dust jackets of the hardbacks can give you ideas for shots, especially commercial images.

26. Step Away from the Magazine Racks

Photography: cathyse97

And if book covers can give you ideas, just think what magazine covers can do. These are designed to be eye-catching and stand out on a shelf. They could make your next photo stand out too.

27. Make Friends in the Photography World
Some photographers find it easiest to shoot alone. Others like to shoot as a group. Everyone can benefit from the feedback, discussions and habits of other photographers.

28. Join Photography Organizations
If you’re a professional and you’re not a member of a professional photography organization, you should be. Not only can organizations help with insurance and legal matters, their news, contests, and profiles of other photographers can inspire to make your own splash among your peers.

29. Shoot Yourself

Photography: hen power

When you’re stuck for a subject, always remember that there’s an interesting one behind the lens too. Be brave. Put yourself in the shot for a change.

30. Revisit Your Past
You probably have a stack of old images that you rarely review, including many that you can’t bring yourself to look at. Give them another chance. A shot that failed a few years ago might well be achievable today — and give you ideas for more.

31. Revisit Places You’ve Been Before
And the same is true of locations. Even if you’ve taken a photograph in one location, it doesn’t follow that you’ll take exactly the same image a few days, months or years later. The light will be different, your skills will be different… and so will you.

32. Ask “What if…?”
Some of the greatest artistic answers have come from asking the right questions. A good one to start with is always “What if…?” What if you focused on the foreground instead of the background? What if you changed the ISO? What if you got a flash of inspiration?

33. Leave Constructive Comments
We’ve mentioned that writing blogs can help to give you new ideas, but so can writing comments on other people’s images. Just make sure the comments are constructive. Praise the photographer’s use of shadow, for example, and you’ll be telling yourself how to get similar praise.

34. Join Photo Contests
Everyone and their uncle these days seems to be running a photography competition. And for good reason. They’re a great way to motivate photographers to shoot outside their boxes.

35. Choose a Theme
Photo contests are helpful because in addition to prizes, they also give subjects to shoot. But you don’t have to actually enter a contest to win one of those. You can pick your own theme. You could even use the categories on stock sites as inspiration for subjects.

36. Check out the Big Winners
And of course, taking a look at images shot by the winners of big photo contests, such as the Pictures of the Year, can show how far your image are from those at the top of the profession… and what you need to do to join them.

37. Go Back to the Rules
You probably know the rules of photography. And you probably know how to bend them and when to break them too. So maybe go back to when you were first learning techniques and try working strictly to rule for a while.

38. Just Shoot Anyway
There are always times when you lift the camera, look at the screen and think, “No.” But what would happen if you did it anyway? At worst, you’d waste a bit of disk space. At best, you might surprise yourself and find a new kind of composition.

39. Get a Cause
Few people are more motivated than those who believe they’re working for the common good. So join them. Pick a cause, offer it your photography skills and the end will help inspire the means. You could find yourself shooting all sorts of things from campaign posters to t-shirt images to angry demonstrations. The variety should be as satisfying as the campaigning.

40. Play with Textures
While photographers often pay attention to light and composition, the texture of the materials in the subject can be left behind. Try focusing on touch rather than vision for a few shots and see what happens…

41. Play with Colors
Or be traditional and paint your pictures with bold colors and sharp contrasts. Or try using different tones of just one or two colors and see what that does for yourt results. It might not be original but if you haven’t done it before, it could be time to give experimenting with colors a try.

42. Drop Color Altogether


Photography: cayusa

Of course, you could also be super-traditional and focus on practicing your skills in black-and-white. Do you know which shots would look best without color?

43. Play with Settings
Chances are, once you’ve found a camera setting that works for you, you don’t stray from it too far. So start straying. Play with the exposure, change the ISO, switch the shutter speed. And build on the results.

44. Play with a Point-and-Shoot
When you shoot with a DSLR, you can get used to all the bells, whistles and options that come with an expensive camera. So lay it aside, pick up an instant and shoot on the cheap. You’ll be amazed at what downgrading can do for your creativity.

45. Just Play
The beauty of digital photography is that there’s no penalty for making mistakes. That gives you a free ticket to stop worrying about whether a picture will turn out well or be an embarrassing flop, and just shoot. So try just enjoy taking photographs without thinking too much about the results.

46. Try a Different Specialty
Whether you specialize in wedding, portraits or anything else, try a niche you’ve never done before. You don’t have to do it professionally but just doing it for a while could give you a whole new bag of techniques and inspire new ways of creating your images.

47. Read Forums
We’ve mentioned that Flickr Groups can be good places to find inspiration but so can photography forums. Often, photographers use them to pose questions, but even those questions can get you thinking. The answers can get you shooting. (That can include your answers too. Tossing in your own two cents’ worth can get you thinking about all things you’re not doing — or haven’t been doing yet.)

48. Start a Project
Inspiration might come in a flash but you want it to hang around. Instead of thinking of an idea for one photograph, try thinking of an idea for a series of photographs. If you’d decided to take pictures of lightning for example, expand the concept to include extreme weather as a whole and add photographs of windswept trees and sun-bleached rooftops. That should keep you busy for a while…

49. Take a Photography Class
Photography classes make thinking up ideas very easy. You’ll even be given assignments so that you don’t have to think up subjects at all, just novel approaches to them.

50. Take any Class


Photography: absolutwade

But you don’t have to limit yourself to a photography class. A cooking class will let you create photography subjects that you can eat. A flower-arranging class could give you new ideas for floral photography. Even an origami class could provide a pile of new ideas for images.

51. Define the Perfect Image
Do you know what the perfect image would look like? Bet you’re thinking about it now, right? Instead of thinking how good the next shoot would be, try thinking about what the best shot would look like… then find it.

52. Create a Shooting Schedule
One way to cut back on the regular head-scratching is to plan ahead. Pull out a calendar and decide in advance what sort of images you’ll be shooting each weekend for the next few months. And leave room for flexibility.

53. Pick a Different Model
If you always use the same models or models with similar looks go for something completely different: the opposite sex, a different height, a new age group. See what a different subject can for your ideas.

54. Ignore the Silly Criticism
This one won’t boost your inspiration but it might stop it being blocked. Ask people to comment on your photos and you’ll always get someone with something dumb to say. The challenge is to pick out the constructive comments and leave out the smartass ones that can make you think twice in the future.

55. Do Something Totally Outrageous
Ever told yourself “That would never work?” Well, here’s a “what if…” What if it did work? Go ahead, surprise yourself. Shoot what’s under the sofa. Snap the top of your head. Do something outrageously silly… and see if it works.

56. Give yourself Limits
Some of the greatest literature has been written under the strictest censorship. So limit yourself. Close the door and shoot only an object that you can find in the room. Or tell yourself that you have to produce a fantastic image within the next half hour. Take up the challenge

57. Tell a Story
Good pictures always tell a story. So try thinking of a story then go out and create the images that illustrate it. That could be the story of your street, a narrative describing a community or even the progression of a cub baseball team. Find where your story begins then use your camera to follow it through to the end.

58. Print your Pictures
It’s one thing to view your photos on a computer screen but printing them out and holding them in your hand can be something else altogether. Try printing a selection of your photos and see whether they still work on paper… and how you can improve them.

59. Take an Object, Any Object…
We started this list by pointing out that flea markets are full of strange objects to photograph. But there’s a limit to how you can photograph an individual object in a flea market. So take one home or pick something off the shelf and give yourself a whole new set of still lifes.

60. Buy New Equipment
And if all else fails, you can always use cash. A burst of new ideas always seems to come free with a new lens.

Exposure Basics

Getting proper exposure requires the right balance of light, lens opening size (aperture), duration of exposure (shutter speed) and sensor sensitivity (ISO setting). In discussion of exposure, the term f-stop is typically used. A change in exposure of 1 f-stop allows half as much light (if the camera is stopped down - less light) or twice as much light (if the camera is opened up - more light) in the final exposure.

Before going on, I'll briefly talk about proper exposure. In normal shooting conditions, I strive to get the final image exposure correct at the time of capture. I use the histogram to monitor my results. If I see pixels stacked at the left (blocked shadows) or right (blown highlights) on the graph, I know that I have lost shadow or highlight detail (all pixels are the same color - black or white). At that point, I have to accept the detail loss or adjust my exposure (or shoot multiple tripod-stabilized frames at different exposures for merging in Photoshop later). Canon's latest generation DSLRs allow great latitude in exposure adjustment during post-processing, but boosting exposure increases noise (digital grain) in the final image. I try to keep the graph on the histogram where it should be for the final image.

That said, I try to error on the high side of the histogram - slightly higher than desired exposure. This technique is often described as "shooting to the right". Actually, some photographers shoot with an exposure even higher than my slightly higher one. Setting your exposure so that the brightest pixels in the image are near/at the right side of the histogram insures that the best detail is retained in the shadow areas of the image. More light from the dark areas of the image is able to reach the sensor - allowing it to capture more and better quality detail. The exposure for these images is then adjusted to perfection during post-processing.

Now, back to ... Getting the proper exposure requires the right balance of light, lens opening size (aperture), duration of exposure (shutter speed) and sensor sensitivity (ISO setting).

I'll leave the discussion of light to another day. Suffice it to say that shooting under bright sunlight is dramatically different than shooting under dim incandescent lighting.

The aperture setting controls how much light is allowed through the lens. Allow less light through, get a darker image. Aperture values are a relationship of the lens opening to the lens focal length. Each full f-stop represents an opening with twice as much area. Typical full f-stop increments are (from wide to narrow) f/1.4, f/2.0, f/2.8, f/4.0, f/5.6, f/8.0, f/11.0, f/16 ... A change in aperture of 1 f-stop requires a change in one of the other exposure parameters by the same amount to retain the same exposure. Keep in mind that aperture also controls DOF (depth of field/focus). The wider the lens is opened, the less DOF. You must determine how much of your image needs to be in sharp focus - or how blurred you want the background. Lenses are typically sharper and have less vignetting when they are stopped down 1 or 2 stops from wide open. I discuss aperture in this Canon Lens Recommendations page as well.

The shutter speed setting determines the duration of light reaching the sensor. Allow the shutter to stay open longer, get a brighter image. If the aperture is changed by 1 f-stop, the shutter speed is required to be changed by an equivalent amount to retain the same exposure. For example, if the aperture is stopped down from f/2.8 to f/4, the shutter speed must be doubled - from 1/250 seconds to 1/125 seconds for example. Slower shutter speeds/longer exposures are not able to mask/stop camera and subject motion as well as fast shutter speeds/shorter exposures. At times, motion in the picture is desired. A rule of thumb for handholding a camera is to use a shutter speed of 1/(the focal length). You need to find your personal requirement for handholding, but this is a good starting point. To stop sports action often requires a shutter speed of minimally 1/500 second and 1/1000 or higher is better. Doubling or halving the shutter speed requires a similar change in one of the other parameters to achieve identical exposure.

The last parameter is the sensor's sensitivity to light - the ISO sensitivity setting. The camera is able to amplify the light its sensor receives by specific, user-adjustable amounts. Full stop settings are from low sensitivity to high sensitivity ISO 100, 200, 400, 800, 1600 and 3200. I always shoot with the lowest ISO speed that will give me the other parameters I need for the shot. Why? Because noise increases and detail decreases as the data received by the sensor is amplified. This is an area where the latest Canon Digital SLRs perform extremely well, but I still prefer the smooth, detailed image produced at ISO 100. Do not trade ISO speed for a blurry image. It is rarely worth it.

As you progress in your photography, you will want to take more control of the various settings that control exposure. Learning to use the creative modes will allow you to control the power of your Digital SLR. Your manual is a great source for learning these modes - And experience/experimentation is one of the best teachers. My most-used mode is Av (you select the aperture and ISO) closely followed by M (you select all parameters). I suggest you start with these.

Digital Photography Tips - The Background

When taking pictures, we concentrate intently on our subjects - but what about the background? Upon later inspection of our photos, we often find the background detracting from an otherwise great shot.

Taking control of the background can help turn a snapshot into a beautiful photo.

The first step to improving the backgrounds in our photos is to be conscious of the background's importance to our photos. We must know that the right backgrounds can make our shots stand out. This often means simply paying attention to what is behind out subjects during our photography sessions.

Unfortunately, the complete solution is not nearly as simple. The normal goal is to keep the subject as the center of interest in a picture (not to be confused with the center of a picture). Your eye should be drawn to the subject in the final image, and the background must not be distracting from the subject. Shots must be setup to take advantage of a clean or pleasing background.

Here are some suggestions ...


My first suggestion is to utilize your lens to throw the background out of focus. The depth of field (amount of in-focus distance) in your picture needs to be reduced enough so that the subject is sharp and the background is blurred. Notice how the Lily stands out against its background in the above picture. There are no distractions. A combination of factors allows your lens to accomplish this task.


First, open the aperture wide. All other factors being identical, a wider the aperture yields a shorter depth of field. How wide? Experience is the best teacher here. The above picture was taken at f/2.8. Experiment!

In conjunction with using a wide aperture setting comes using a lens that has a very wide aperture such as the Canon EF 85mm f/1.8 Lens. It can create a blurred background much more easily than a slow lens (such as the Canon EF 24-85mm f/3.5-4.5 lens). The fast lens has much more latitude on the wide end of the aperture than the slow lens.


Another way to get a more diffusely blurred background is to use a lens with a long focal length such as the Canon EF 70-200mm f/2.8 L IS Lens used for the above Monster Buck picture. It will be much more difficult to blur a background with the Canon EF 16-35mm f/2.8 L Lens. All focal lengths yield the same depth of field when used at the same aperture setting and subject framing. But, the image compression a telephoto focal length provides magnifies the already blurred background. The result is a background that appears more diffusely blurred.

Using a higher focal length has the additional advantage of including less background in your picture. A higher focal length lens has a smaller angle of view. Pretty simple - less background in your picture leaves less room for distraction. This may be a reason to choose the Canon EF 180mm L USM Macro Lens over the Canon EF 100mm USM Macro Lens. Again, less background in the picture reduces the chance of distractions.

Fireworks Photography Tips


The spectacle of fireworks attracts millions of spectators annually.

Those of us with love for photography running deep desire to capture everything of beauty we come upon. Fireworks definitely fit that description. The good news is that fireworks photography is easy. Following are some tips to make your fireworks photography successful.

Start with a solid tripod. If your camera is not motionless during the rather long exposures necessary for fireworks photography, the smooth paths of light the fireworks create will appear jagged. Mount your camera on a tripod and carefully level it. I generally like a portrait/vertical orientation (vs. landscape/horizontal orientation), but that is personal preference and is greatly influenced by additional subjects framed in the picture. Fireworks launched simultaneously from multiple locations also work well with a landscape orientation.

Also important is a remote release for the camera. Again, you want the camera to be motionless during the exposure.

Most camera lenses will work well as long as they are the right focal length or focal length range. Most camera lenses provide very good optical quality at f/8 through f/16, the apertures most used for fireworks photography. If you are not sure what focal length you need, take a couple of lenses. Zoom lenses provide the most flexibility if you are not sure of your viewing distance or focal length requirements. A scouting trip prior to the event will (as always) prove valuable.

All fireworks events take place after dark. Working in the dark is challenging even when you are intimately familiar with your equipment. A small issue such as dropping a memory card can turn into a frustrating problem. Pack a small flashlight.

Show up early for the fireworks event. Make sure your location has a clear line of site and that late arriving viewers cannot obstruct your view. You might setup your equipment behind your blanket to help keep the view clear. At the same time, treat others with consideration. Be sure the background is pleasant. Remember that street and other lights will become overexposed blobs that require post-processing to remove. Setting up in the daylight is easier than in the dark. Leveling the camera, setting manual focus and getting the proper framing is difficult against a dark sky. Framing may need to be tweaked after the action starts - but take a guess. Get all of these tasks out of the way before complete darkness.

I generally use manual everything for fireworks photography: manual exposure, manual focus ...

As I mentioned previously, I like to setup my manual focus setting prior to dark. Pick a subject that is a similar distance as the fireworks will be. Since I often start my exposures with a dark sky over all focus points, autofocus does not work. Since a narrow aperture is used at a generally long distance, a wide depth of field usually covers any manual focus errors. Be careful to not bump the focus ring after the action starts. Also remember that changing focal length changes focusing in some zoom lenses. Check your lens for this attribute before dark. As a focus alternative, you can focus on the first burst that is fired.

For a shutter speed, Bulb is often best. I like to press the remote shutter release as a rocket is launching and hold it open until the firework completely fades from its explosion. This is generally 2 to 10 seconds. Missed the rockets on the first blast? You might be able to include the next set of rockets in the same exposure. Because the fireworks are constantly and rapidly moving, keeping the shutter open for long periods of time does not affect the exposure. Exposure is based on the aperture and ISO settings used. If there are subjects in addition to the fireworks included in the photo that are lit by a constant light, a specific shutter speed may be required.

You may think that a fast aperture would be helpful since you are shooting in the dark, but you are actually shooting bright light. The best aperture is usually between a narrow f/8 and an even narrower f/16. The exact setting is somewhat dependent on the distance of the fireworks (light fall-off, air clarity). Using an aperture narrower than f/16 will result in soft (not sharp) images as diffraction becomes an issue. Watch your histogram - keep the brightest pixels close to the right of the graph but not overexposed (stacked on the right side of the histogram).

I generally use ISO 100 for the lowest noise levels possible.

Quickly analyze the first photograph you can capture. How does the histogram read? Is the framing correct? Remember that you can crop later - but building missing sections of bursts very complicated and time consuming. Is the image sharp? Make any adjustments necessary until you have it perfected. Then concentrate on the action. Long shows will require lots of memory capacity - be prepared - Have spare cards pre-formatted. Make spot checks periodically to make sure no settings have changed.

Avoid too many bursts in one fireworks photo. In my opinion, the overexposed areas created by repeated rockets and bursts make a fireworks photo look unattractive in addition to looking too busy. The finale may be the worst time to photograph fireworks. Your opinion may be different - and photography has no rules. Be creative.

For added impact, get additional subjects in your fireworks photos. Large buildings look great in fireworks pictures. Lakes and rivers create beautiful reflections. Adding a person or persons to the photo adds interest. A flash will be of no use in lighting the fireworks, but can be useful in lighting a foreground subject watching the fireworks. Try lighting foreground subjects with your flashlight. You will probably want to focus on foreground subjects instead of the fireworks for these shots. Again, be creative!

Creativity doesn't need to end with the shot. The black sky background in fireworks photos makes it easy to add other fireworks blasts or other items (such as a moon) to your images in Photoshop. Try replacing the complete black background with your country's flag.

Fireworks photography is not hard. Getting a great looking fireworks photograph just requires a little planning and simple execution. You will be adding impressive shots to your collection in no time.

Photoshop tutorials

i think that everyone knows the youtube tutorials (rather than to post those i've put a videobar)
and i will recommend some sites that i visit for documentation

Tutorialized i think it's the biggest source of tutorials on the net (from photoshop to 3d studio max)

from the category blog/site with something interesting to check out...

Trimoon This is a place of interesting things such as photography and things of an artistic nature. Not unlike the junk drawer in your kitchen, full of things you may need someday.

PSDTUTS (ce nume are si asta :P) PSDtuts is a blog/photoshop site made to house and showcase some of the best Photoshop tutorials around. We publish tutorials that not only produce great graphics and effects, but explain in a friendly, approachable manner.

Luxa is a social learning site for Photoshop artists providing new tutorials and design articles, as voted and suggested by your fellow users.

Photoshop Essentials Here, you'll find our complete list of Photoshop tutorials covering the basics of Photoshop, all written with beginner Photoshop users in mind, with an easy to follow, step-by-step approach. While most of the Photoshop tutorials listed here were written using Photoshop CS2, they can be completed using any recent version of Photoshop, including Photoshop 7, CS and CS3.

PST Mission: To create a friendly, community supported site dedicated to helping users of all skill levels get the most out of Adobe Photoshop.

9tutorials

from the forum category we have...

Canon Digital Photography Forums This is a forum for digital camera enthusiasts using Canon cameras. The forums contain also general photography and technique discussion areas which are not camera-type specific.

Fototarget amateur photography community

Creating Mood With Color

Just as music builds mood, colors can also help create mood. A lot has been written on what each color denotes, what emotions it evokes. Colors also have an impact on one's health. Did you ever think that the colors in a photograph can actually make someone look at it over and over again or probably turn-off the viewer. In fact the colors in photographs can set the pace and mood of your surroundings and impact you deeply.

Let's understand the core of a photo or a painting for that matter. Human subconsciousness readily sees things in symmetry. Therefore, a symmetrical figurine or view would register faster. Asymmetrical view (in this case a photograph) would also catch attention but with some portions drawing more attention than others.

Next comes the color and texture. Colors in your photograph can have an impact in two ways. One, through the contrast created by using colors of 'cooler hues' along with colors of 'warmer hues'. Second, through the use of a color-type in dominance you could create vibrance, tranquility or royal elegance. Red, Orange and Yellow of the spectrum are warm colors. Blue, Purple and Green on the other hand are cool colors

If a photograph is created with a contrast, the warmer tones need to be occupying less space as these colors draw away attention. They have an effect of warmth & excitement, which when used in excess can also be agitating.

Red is the best choice for creating warmth & passion in your photo. Why on earth did you think that Valentine's Day is all about red flowers, red balloons and a long flowing red dress? Red with a background in white adds drastic contrast but has an element of grace to it.

Orange is a mixture of yellow and red. It therefore, brings in enthusiasm and warmth. Nature's best hues are when the sun goes down and colors the sky in a confused array of pink, orange and yellow.

Yellow reflects most of the light and thus draws lots of attention; too bright a shade will leave you irritated. Prolonged exposure can also have a tiring effect. It is best used in down-tones; as background for white articles/figures.

Green is the color of tranquility and vibrance. It's nature's color and often gets used in pro photography for food advertising. It seems perfect when paired up with yellow. They have opposite impacts on your mood. Though it may sound like a garish combination, when used in equal proportions it has lasting impact on your photographs.

Blue produces a sense of calmness, which edges more towards sadness. Someone once said-'I am felling blue'. Blue is also a very responsible color, very corporate and powerful, when paired with black.

Black has varied meanings in different cultures across the globe. Universally, it's the color of choice for most formal occasions equally for men and women. It makes your silhouette look slimmer. It takes in all the color and should be used sparingly in photos. Most welcome to be used with warm colors or when the sentiment is serious..

Use white and pink to create a softer look. White creates a sense of space and is ideal to give a deeper look to your photograph. And if you got a flared pink dress, just sit on the green rug across a white background to get clicked....you will love that photograph on your wall for years to come.

Now that you are aware of what colors can do to the photographs! Now go enliven yourself with those snazzy snaps in the living room or retire in that lounge area with cool blues. Ah! and not to forget the right kind of shades too.

By: Domen Lombergar

Exposure, Shutter Speed and Aperture Made Simple

Exposure is one of the most important photography concepts to learn, but it is also one which strikes fear into the hearts of even the most intrepid photographer - after all, it all sounds so... technical! As it turns out, exposure is actually a very simple thing to grasp and, once you do, it allows you so much more control over your photos that you'll wonder how you ever lived without it.

Exposure


Exposure is simply the amount of light that reaches our camera's sensor or film. Like Goldie Locks and her porridge, we're looking to capture just the right amount of light to show off all the details of our scene. Too much light and we end up with an overexposed photo; too little and it comes out dark and underexposed.

So how do we control exposure? By using two basic camera properties - the shutter speed and the lens aperture diameter.

Shutter Speed

Shutter speed is a measure of how long the camera's shutter is open for. A fast shutter speed might be around 1/1000th of a second, while a slow shutter speed can be up to several seconds or longer. Plus of course you can have anything in between.The longer the shutter is open for, the slower the shutter speed, and the more light we capture.

Aperture Diameter

This is perhaps the most daunting camera setting, but it's actually very simple. The aperture is an opening within the camera's lens that can get wider or narrower. A wide aperture allows more light through in a given amount of time than a narrow one.

Aperture is measured by an 'f-number'. Somewhat confusingly, a small f-number (e.g. f2.0) means we have a wide aperture, which will let in more light. A large f-number (say f32) means we have a narrow aperture, letting in less light.

Combining Shutter Speed and Aperture Diameter for a Perfect Exposure

By now you can probably see that there are many combinations of shutter speed and aperture diameter that will give us our desired exposure. For example we could use a fast shutter speed and a wide aperture, or a slower shutter speed and a narrow aperture, and still let in the same amount of light, giving us the same exposure.

The exact settings you use depend on the situation and the effect you want to achieve.

If you are photographing a fast-moving object like a car, then you'll need to use a fast shutter speed to prevent it coming out blurred. For this you'll need a wide aperture to let in enough light in the short space of time the shutter is open for.

If on the other hand you want to maximize your scene's depth of field, you'll need to use a narrow aperture, which will necessitate a slower shutter speed.

The key to finding the best shutter speed and aperture diameter settings for your scene is to experiment with several different combinations. Each will give your scene a unique 'feel', and you'd be surprised at the amount of times the 'wrong' settings will produce the best photo.

By: Pete G Williams

Tutorials

i've found some more interesting tutorials
and thought to share with you

9 Pet Photography Tips
Pets fill very quickly their place in our hearts and families and we enjoy having their pictures framed on our desk or wall! However taking pictures of your best friend is not always easy. Pets, unlike humans, do not understand what we are trying to do and won’t just pose for the camera! Here are 9 tips that will help you help you get the most of your photo session

Replacing Skies or What Mood Today
If you are a bit like me and look upon photography with more artistic freedom, you will have a folder of many different skies that range from dark and gloomy to bright cirrus and even vivid sunsets. Then just grab the sky you want and insert into the image with minor effort.

Grand Cayman Fuel Depot
Ryan Goodman ran a project asking his readers to revisit and retouch one of his photos. I’m a little late in getting around to doing the project, but the deadline is January 25 — so you still have a bit of time to get an entry in if you’re interested in participating.

Photoshop® Top Secret™ free download from torrents


i have also found the torrent
you can get it from HERE

Photoshop® Top Secret™ free download


I found this great turorial.

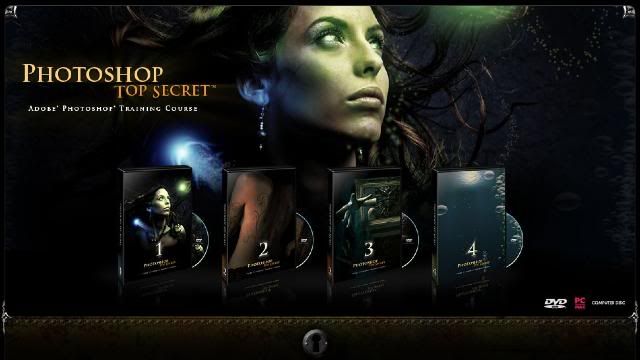
How to Become a Photoshop "Black Belt"-Fast!Just released by Mark Monciardini, Photoshop Top Secret is an Extreme Training Course that teaches you, step by step, how to create cutting-edge graphics and special effects with Adobe Photoshop. This student-friendly home study course includes four DVD-ROMs with over 16 gigabytes of video tutorials and project files. It also comes with a full-color gallery book (printed, not pdf) that shows the end result of each project in the course. You can look, learn, practice, and master these advanced techniques wherever you may be, without the need for expensive classes or tutors. Create Posters, Movie Covers, Surreal Graphics and More!The course will teach you how to become the ultimate Photoshop "black belt" for fun and/or profit. You'll learn how to create top-level special effects for eye-catching movie posters, album covers, book jackets, brochures, mailing pieces, magazine covers, article illustrations, and a tremendously wide range of print ads and Web site graphics.

http://www.photoshoptopsecret.com/


Movie Poster I
Create a popular people montage seen on many movie posters.

LINK:
http://rapidshare.com/users/LA462P

Movie Poster II
Take an ordinary house and turn it into a Sci-fi Movie Poster.

LINK:
http://rapidshare.com/files/50401418/Movie_Poster_II.part1.rar
http://rapidshare.com/files/50401400/Movie_Poster_II.part2.rar
http://rapidshare.com/files/50401624/Movie_Poster_II.part3.rar
http://rapidshare.com/files/50401409/Movie_Poster_II.part4.rar

Movie Poster Credits
Tips and tricks on creating a real “Credit Block” for movie posters.

LINK:
http://rapidshare.com/files/50401376/Movie_Credits.part1.rar
http://rapidshare.com/files/50401383/Movie_Credits.part2.rar
http://rapidshare.com/files/50401535/Movie_Credits.part3.rar
http://rapidshare.com/files/50401285/Movie_Credits.part4.rar

Dark Faces
How I created my creepy Image that has been in Magazines and Ads.

LINK:
http://rapidshare.com/files/50401428/Dark_Faces.rar

Breaking Apart

Create the illusion that a face is falling apart.

LINK:
http://rapidshare.com/files/50402466/Break_Apart.part1.rar
http://rapidshare.com/files/50401560/Break_Apart.part2.rar
http://rapidshare.com/files/50401508/Break_Apart.part3.rar
http://rapidshare.com/files/50401311/Break_Apart.part4.rar

Dream Scene Montage
Create an elephant with wings and place it into a futuristic world.

LINK:
http://rapidshare.com/files/50401529/Dream_SceneMontage.part1.rar
http://rapidshare.com/files/50401668/Dream_SceneMontage.part2.rar
http://rapidshare.com/files/50401563/Dream_SceneMontage.part3.rar
http://rapidshare.com/files/50401278/Dream_SceneMontage.part4.rar

Stone Portrait
Create a “Stone Bust” out of a portrait for a killer special effect.

LINK:
http://rapidshare.com/files/50401623/Stone_Portrait.part1.rar
http://rapidshare.com/files/50401697/Stone_Portrait.part2.rar
http://rapidshare.com/files/50401886/Stone_Portrait.part3.rar
http://rapidshare.com/files/50401673/Stone_Portrait.part4.rar
http://rapidshare.com/files/50401756/Stone_Portrait.part5.rar

Surreal Mist

Create a creamy foggy mist over water and rocks.

LINK:
http://rapidshare.com/files/50401540/Surreal_Mist.part1.rar
http://rapidshare.com/files/50401544/Surreal_Mist.part2.rar
http://rapidshare.com/files/50401580/Surreal_Mist.part3.rar
http://rapidshare.com/files/50401331/Surreal_Mist.part4.rar

Dream Skin
Create a fantasy woman with henna art and dream skin.

LINK:
http://rapidshare.com/files/50401589/Dream_Skin.part1.rar
http://rapidshare.com/files/50401759/Dream_Skin.part2.rar
http://rapidshare.com/files/50401429/Dream_Skin.part3.rar
http://rapidshare.com/files/50401323/Dream_Skin.part4.rar

Special Effects
Learn How to create Orbs, Fireballs and Jellyfish like creatures.

LINK:
http://rapidshare.com/files/50401314/Special_Effects.part1.rar
http://rapidshare.com/files/50401431/Special_Effects.part2.rar
http://rapidshare.com/files/50401417/Special_Effects.part3.rar
http://rapidshare.com/files/50401340/Special_Effects.part4.rar
http://rapidshare.com/files/50401318/Special_Effects.part5.rar
http://rapidshare.com/files/50401320/Special_Effects.part6.rar
http://rapidshare.com/files/50401415/Special_Effects.part7.rar
http://rapidshare.com/files/50401328/Special_Effects.part8.rar
http://rapidshare.com/files/50401308/Special_Effects.part9.rar


Swapping Faces
How to take the face from one photo and place it into a completely different one.

LINK:
http://rapidshare.com/files/51023966/01_Intro.mov
http://rapidshare.com/files/51028936/02_Getting_Started.mov
http://rapidshare.com/files/51030721/03_Matching_Skin_Tones.mov
http://rapidshare.com/files/51032577/04_Face_Shadow_Secrets.mov
http://rapidshare.com/files/51035325/05_Skin_Matching_Secrets.mov

Pop Art
Turn a Photograph into artwork that was popular in the mid 1950’s.

LINK:
http://rapidshare.com/files/50496722/Pop_Art.part1.rar
http://rapidshare.com/files/50492866/Pop_Art.part2.rar

Applying Tattoos
How to apply henna and tattoos to skin.

LINK:
http://rapidshare.com/files/50481136/Applying_Tattoo_s.part1.rar
http://rapidshare.com/files/50483392/Applying_Tattoo_s.part2.rar

Masking Fur
Seamlessly remove the background from furry animals.

LINK:
http://rapidshare.com/files/50485223/Masking_Fur.part1.rar
http://rapidshare.com/files/50487518/Masking_Fur.part2.rar
http://rapidshare.com/files/50489816/Masking_Fur.part3.rar

Vanishing Point
What Vanishing Point is and how to edit images with perspective.

LINK:
http://rapidshare.com/files/50507223/Vanishing_Point.part1.rar
http://rapidshare.com/files/50511659/Vanishing_Point.part2.rar

Web Graphics
Learn how to create commonly used web graphics and screen shots.

LINK:
http://rapidshare.com/files/50520851/Elegant_Headers.rar
http://rapidshare.com/files/50526991/Logo_Basics.rar
http://rapidshare.com/files/50532499/Download_Button.rar
http://rapidshare.com/files/50543201/Seal_of_Guarantee.rar
http://rapidshare.com/files/50552172/Screen_Captures__PC_.rar
http://rapidshare.com/files/50545451/Screen_Captures__Mac_.rar
http://rapidshare.com/files/50549863/Subscribe_Button.rar
http://rapidshare.com/files/50558175/Order_Button.rar
http://rapidshare.com/files/50559384/Computer_Screen_Images.rar

Shattered Type
Create the illusion that text is being shattered like glass.

LINK:
http://rapidshare.com/files/50500038/Shattered_Type.part1.rar
http://rapidshare.com/files/50503596/Shattered_Type.part2.rar

Flower Greeting Card
Use the vector tools in Photoshop to create an elegant looking Greeting Card.

LINK:
http://rapidshare.com/files/50468558/Flower_Greeting_Card.part1.rar
http://rapidshare.com/files/50475456/Flower_Greeting_Card.part2.rar
http://rapidshare.com/files/50470571/Flower_Greeting_Card.part3.rar


Creating DVD Covers
Mark shows you exactly how he created the Photoshop Top Secret DVD covers.

LINK:
http://rapidshare.com/files/50479036/Creating_DVD_Cover_s.part1.rar
http://rapidshare.com/files/50477320/Creating_DVD_Cover_s.part2.rar


Flying out of Bounds

Create the classic “out of bounds” effect with a very cool masking trick.

LINK:
http://rapidshare.com/files/53854880/-__Feersum__-FlyingOOB.part1.rar
http://rapidshare.com/files/53858779/-__Feersum__-FlyingOOB.part2.rar
http://rapidshare.com/files/53851192/-__Feersum__-FlyingOOB.part3.rar

Reaching out of Bounds
Creating the illusion of arms and hands reaching out of a picture frame.

LINK:
http://rapidshare.com/files/51278203/Reaching_Out_of_Bounds.part1.rar
http://rapidshare.com/files/51282073/Reaching_Out_of_Bounds.part2.rar

Chocolate Milk Frog
How to make a frog covered in chocolate.

LINK:
http://rapidshare.com/files/51090808/Chocolate_Milk_Frog.part1.rar
http://rapidshare.com/files/51093773/Chocolate_Milk_Frog.part2.rar
http://rapidshare.com/files/51098112/Chocolate_Milk_Frog.part3.rar
http://rapidshare.com/files/51100483/Chocolate_Milk_Frog.part4.rar
http://rapidshare.com/files/51104392/Chocolate_Milk_Frog.part5.rar

Covered with Wax
Choose an object and cover it with melting wax.

LINK:
http://rapidshare.com/files/51106691/Covered_With_Wax.part1.rar
http://rapidshare.com/files/51109790/Covered_With_Wax.part2.rar
http://rapidshare.com/files/51112318/Covered_With_Wax.part3.rar

Grunge Look

Create a unique grunge background that can be used for almost anything.

LINK:
http://rapidshare.com/files/51192260/The_Grunge_Look.part1.rar
http://rapidshare.com/files/51196157/The_Grunge_Look.part2.rar
http://rapidshare.com/files/51200111/The_Grunge_Look.part3.rar

Square Fruit
Play with mother nature by changing the shape of fruit.

LINK:
http://rapidshare.com/files/51287450/Square_Fruit.part1.rar
http://rapidshare.com/files/51291484/Square_Fruit.part2.rar http://rapidshare.com/files/51718794/Square_Fruit.part3.rar

Invisible Man

How to make a person vanish from their clothing.

LINK:
http://rapidshare.com/files/51205433/Invisible_Man.part1.rar
http://rapidshare.com/files/51210895/Invisible_Man.part2.rar
http://rapidshare.com/files/51216175/Invisible_Man.part3.rar

Metal Collage

How to create a Robot with pieces of a Photo and then place it into another world.

LINK:
http://rapidshare.com/files/51223497/Metal_Collage.part1.rar
http://rapidshare.com/files/51228285/Metal_Collage.part2.rar

Morphing Creatures

Morph animals and reptiles together to create interesting creatures.

LINK:
http://rapidshare.com/files/51252979/Morphing_Creatures.part1.rar
http://rapidshare.com/files/51259915/Morphing_Creatures.part2.rar
http://rapidshare.com/files/51264571/Morphing_Creatures.part3.rar
http://rapidshare.com/files/51272001/Morphing_Creatures.part4.rar

Using Layer Comps
How to create multiple layouts in one Photoshop file using Layer Comps.

LINK:
http://rapidshare.com/files/51219597/Layer_Comps.part1.rar


Vector Art Portrait
Turn a Photograph into beautiful vector art.

LINK:
http://rapidshare.com/files/51851146/Vector_Art_Portrait.part1.rar
http://rapidshare.com/files/51856684/Vector_Art_Portrait.part2.rar
http://rapidshare.com/files/51865053/Vector_Art_Portrait.part3.rar
http://rapidshare.com/files/51877688/Vector_Art_Portrait.part4.rar
http://rapidshare.com/files/51887762/Vector_Art_Portrait.part5.rar
http://rapidshare.com/files/51895918/Vector_Art_Portrait.part6.rar

Dreamy Background
Create Sci-fi looking spiral backgrounds.

LINK:
http://rapidshare.com/files/51748767/Dreamy_Backgrounds.part1.rar

Liquid Metal
The ultimate Liquid metal technique that can be applied to text and objects.

LINK:
http://rapidshare.com/files/51751193/Liquid_Metal.part1.rar
http://rapidshare.com/files/51755087/Liquid_Metal.part2.rar
http://rapidshare.com/files/51758424/Liquid_Metal.part3.rar
http://rapidshare.com/files/51759757/Liquid_Metal.part4.rar


Smoke

Create Psychedelic and Natural Smoke to incorporate into your artwork.

LINK:
http://rapidshare.com/files/51776133/Smoke.part1.rar
http://rapidshare.com/files/51780548/Smoke.part2.rar

Soap Bubbles
Use soap bubbles to add flair to your projects.

LINK:
http://rapidshare.com/files/51784928/Soap_Bubbles.part1.rar
http://rapidshare.com/files/51791004/Soap_Bubbles.part2.rar

Water Bubbles

Use these water bubbles to infuse imagination into your projects.

LINK:
http://rapidshare.com/files/51909867/Water_Bubbles.part1.rar

Underwater Scene
Create an underwater illusion with just the tools in Photoshop.

LINK:
http://rapidshare.com/files/51846287/Underwater_Scene.part1.rar


Swap Animal Skin
Take skin from one animal and place it over another.

LINK:
http://rapidshare.com/files/51836472/Swap_Animal_Skin.part1.rar

Stylized Character
Turn a sketch into colorful art.

LINK:
http://rapidshare.com/files/51796685/Stylized_Character.part1.rar
http://rapidshare.com/files/51804210/Stylized_Character.part2.rar
http://rapidshare.com/files/51815699/Stylized_Character.part3.rar
http://rapidshare.com/files/51825512/Stylized_Character.part4.rar

Masking Mastery
Special video that explains many masking techniques used by the pros.

LINK:
http://rapidshare.com/files/51762273/Masking_Mastery.part1.rar
http://rapidshare.com/files/51766415/Masking_Mastery.part2.rar
http://rapidshare.com/files/51768184/Masking_Mastery.part3.rar
http://rapidshare.com/files/51770219/Masking_Mastery.part4.rar

--------------------------------------------------------------------------------------------------------------------------------
Project Files/Exercise Files

DVD 1

LINK:
http://rapidshare.com/files/50566319/Project_Files.part01.rar
http://rapidshare.com/files/50572676/Project_Files.part02.rar
http://rapidshare.com/files/50584119/Project_Files.part03.rar
http://rapidshare.com/files/50591357/Project_Files.part04.rar
http://rapidshare.com/files/50598245/Project_Files.part05.rar
http://rapidshare.com/files/50606188/Project_Files.part06.rar
http://rapidshare.com/files/50608594/Project_Files.part07.rar

DVD 2

LINK:
http://rapidshare.com/files/53264692/-__Feersum__-PSec-2-Proj.part1.rar
http://rapidshare.com/files/53265853/-__Feersum__-PSec-2-Proj.part2.rar

DVD 3

LINK:
http://rapidshare.com/files/51180564/Project_Files.part1.rar
http://rapidshare.com/files/51184147/Project_Files.part2.rar
http://rapidshare.com/files/51187840/Project_Files.part3.rar


DVD 4

LINK:
http://rapidshare.com/files/51730477/Project_Files.part1.rar
http://rapidshare.com/files/51734240/Project_Files.part2.rar
http://rapidshare.com/files/51736922/Project_Files.part3.rar


Theirs also a Gallerybook included

Download:

LINK:
http://rapidshare.com/files/50616998/DVD_Covers_and_Labels.zip
http://rapidshare.com/files/50612698/Photoshop_TopSecret_Gallery_Book.pdf.zip


Torrents If Interested

http://rapidshare.com/files/49495944/Photoshop_Torrents.zip


The links work for now so download before they remove them