ike rhythm, pattern is built on repetition,
but unlike rhythm it is associated with area,
not direction. A pattern does not encourage the
eye to move in a particular way, but rather to
roam across the surface of the picture. It has at
least an element of homogeneity, and, as a result,
something of a static nature.
The prime quality of a pattern is that it covers
an area, thus the photographs that show the
strongest pattern are those in which it extends
right to the edges of the frame. Then, as with
an edge-to-edge rhythm, the phenomenon of
continuation occurs, and the eye assumes that
the pattern extends beyond. The photograph
of the bicycle saddles illustrates this. In other
words, showing any border at all to the pattern
establishes limits; if none can be seen, the image
is take to be a part of a larger area.
At the same time, the larger the number of
elements that can be seen in the picture, the more
there is a sense of pattern than of a group of
individual objects. This operates up to a quantity
at which the individual elements become difficult
to distinguish and so become more of a texture.
In terms of the number of elements, the effective
limits lie between about ten and several hundred,
and a useful exercise when faced with a mass of
similar objects is to start at a distance (or with
a focal length) that takes in the entire group,
making sure that they reach the frame edges,
and then take successive photographs, closing in,
ending with just four or five of the units. Within
this sequence of images there will be one or two
in which the pattern effect is strongest. Pattern,
in other words, also depends on scale.
A pattern seen at a sufficiently large scale
takes on the appearance of texture. Texture is
the primary quality of a surface. The structure
of an object is its form, whereas the structure of
the material from which it is made is its texture.
Like pattern, it is determined by scale. The
texture of a piece of sandstone is the roughness
of the individual compacted grains, a fraction
of a millimeter across. Then think of the same
sandstone as part of a cliff; the cliff face is now
the surface, and the texture is on a much larger
scale, the cracks and ridges of the rock. Finally,
think of a chain of mountains that contains this
cliff face. A satellite picture shows even the largest
mountains as wrinkles on the surface of the earth:
its texture. This kind of repeating scale of texture
is related to fractal geometry.
Texture is a quality of structure rather than
of tone or color, and so appeals principally to
the sense of touch. Even if we cannot physically
reach out and touch it, its appearance works
through this sensory channel. This explains why
texture is revealed through lighting—at a small
scale, only this throws up relief. Specifically, the
direction and quality of the lighting are therefore
important. Relief, and thus texture, appears
strongest when the lighting is oblique, and when
the light is hard rather than soft and diffuse.
These conditions combine to create the sharpest
shadows thrown by each element in the texture,
whether it is the weave in a fabric, the wrinkles
in leather, or the grain in wood. As a rule, the
finer the texture, the more oblique and hard the
lighting it needs to be seen clearly—except that
the smoothest of all surfaces are reflective,
such as polished metal, and texture is replaced
by reflection (see page 124).
Related to pattern and texture, but with
content playing a stronger role, is the idea
of many, as in a crowd of people or a large
shoal of fish. The appeal of huge numbers
of similar things lies often in the surprise of
seeing so many of them in one place and at
one time. The view of the Kaaba in Mecca,
seen from one of the minarets, for example,
is said to take in at least a million people, and
this fact is itself remarkable. Large numbers
congregating usually constitutes an event.
Framing to within the edges of the mass allows
the eye to believe that it continues indefinitely.vvvvvvvvvvvvvvvvvvvvvvv
Showing posts with label cool. Show all posts
Showing posts with label cool. Show all posts
Sunday, December 21, 2008
Monday, June 9, 2008
Smashing Texture


Tuesday, March 11, 2008
Context Aware Image Re-Sizing
If you have a large image that you need to make smaller you can either scale it or crop it. Scaling makes everything smaller and cropping can cut out important content. This jaw-dropping video demonstrates an image re-sizing algorithm that is content-aware. I was amazed; I hope it's real and coming to Firefox extension soon.
Wednesday, February 20, 2008
The Principles of Beautiful Web Design Free Download

I fund this great book "The Principles of Beautiful Web Design" it,s not exactly about photo but has a section about colors that can be really helpful. Hope that you can find it useful.
If you are squeamish about choosing colors, feel uninspired by a blank browser window, or get lost trying to choose the right font, this book is for you. In it, I take a methodical approach to presenting traditional graphic design theory as it applies to today’s web site development industry. While the content is directed toward programmers and developers, it provides a design primer that will benefit readers at any level.
This book will show you how to:
* Create amazing designs from scratch.
* Understand why some designs just “work.”
* Unleash your creative talents.
* Master the design fundamentals: layout, color, texture, typography, and imagery.
* Uncover the trade secrets the great designers keep to themselves.
…and much more. Far too many things to mention here!
About the author:
“Jason the Designer Man,” as one of his coworkers once called him, dual-majored in graphic design and digital media at the University of Central Florida. When he’s not working on websites, he enjoys disassembling electronics and using them in his artwork. Jason writes about his adventures in design and technology on his personal site, jasongraphix.com.
You can download it for free here
“You don’t need to go to Art School to design great looking web sites!”
Tuesday, February 12, 2008
Exposure Basics
Getting proper exposure requires the right balance of light, lens opening size (aperture), duration of exposure (shutter speed) and sensor sensitivity (ISO setting). In discussion of exposure, the term f-stop is typically used. A change in exposure of 1 f-stop allows half as much light (if the camera is stopped down - less light) or twice as much light (if the camera is opened up - more light) in the final exposure.
Before going on, I'll briefly talk about proper exposure. In normal shooting conditions, I strive to get the final image exposure correct at the time of capture. I use the histogram to monitor my results. If I see pixels stacked at the left (blocked shadows) or right (blown highlights) on the graph, I know that I have lost shadow or highlight detail (all pixels are the same color - black or white). At that point, I have to accept the detail loss or adjust my exposure (or shoot multiple tripod-stabilized frames at different exposures for merging in Photoshop later). Canon's latest generation DSLRs allow great latitude in exposure adjustment during post-processing, but boosting exposure increases noise (digital grain) in the final image. I try to keep the graph on the histogram where it should be for the final image.
That said, I try to error on the high side of the histogram - slightly higher than desired exposure. This technique is often described as "shooting to the right". Actually, some photographers shoot with an exposure even higher than my slightly higher one. Setting your exposure so that the brightest pixels in the image are near/at the right side of the histogram insures that the best detail is retained in the shadow areas of the image. More light from the dark areas of the image is able to reach the sensor - allowing it to capture more and better quality detail. The exposure for these images is then adjusted to perfection during post-processing.
Now, back to ... Getting the proper exposure requires the right balance of light, lens opening size (aperture), duration of exposure (shutter speed) and sensor sensitivity (ISO setting).
I'll leave the discussion of light to another day. Suffice it to say that shooting under bright sunlight is dramatically different than shooting under dim incandescent lighting.
The aperture setting controls how much light is allowed through the lens. Allow less light through, get a darker image. Aperture values are a relationship of the lens opening to the lens focal length. Each full f-stop represents an opening with twice as much area. Typical full f-stop increments are (from wide to narrow) f/1.4, f/2.0, f/2.8, f/4.0, f/5.6, f/8.0, f/11.0, f/16 ... A change in aperture of 1 f-stop requires a change in one of the other exposure parameters by the same amount to retain the same exposure. Keep in mind that aperture also controls DOF (depth of field/focus). The wider the lens is opened, the less DOF. You must determine how much of your image needs to be in sharp focus - or how blurred you want the background. Lenses are typically sharper and have less vignetting when they are stopped down 1 or 2 stops from wide open. I discuss aperture in this Canon Lens Recommendations page as well.
The shutter speed setting determines the duration of light reaching the sensor. Allow the shutter to stay open longer, get a brighter image. If the aperture is changed by 1 f-stop, the shutter speed is required to be changed by an equivalent amount to retain the same exposure. For example, if the aperture is stopped down from f/2.8 to f/4, the shutter speed must be doubled - from 1/250 seconds to 1/125 seconds for example. Slower shutter speeds/longer exposures are not able to mask/stop camera and subject motion as well as fast shutter speeds/shorter exposures. At times, motion in the picture is desired. A rule of thumb for handholding a camera is to use a shutter speed of 1/(the focal length). You need to find your personal requirement for handholding, but this is a good starting point. To stop sports action often requires a shutter speed of minimally 1/500 second and 1/1000 or higher is better. Doubling or halving the shutter speed requires a similar change in one of the other parameters to achieve identical exposure.
The last parameter is the sensor's sensitivity to light - the ISO sensitivity setting. The camera is able to amplify the light its sensor receives by specific, user-adjustable amounts. Full stop settings are from low sensitivity to high sensitivity ISO 100, 200, 400, 800, 1600 and 3200. I always shoot with the lowest ISO speed that will give me the other parameters I need for the shot. Why? Because noise increases and detail decreases as the data received by the sensor is amplified. This is an area where the latest Canon Digital SLRs perform extremely well, but I still prefer the smooth, detailed image produced at ISO 100. Do not trade ISO speed for a blurry image. It is rarely worth it.
As you progress in your photography, you will want to take more control of the various settings that control exposure. Learning to use the creative modes will allow you to control the power of your Digital SLR. Your manual is a great source for learning these modes - And experience/experimentation is one of the best teachers. My most-used mode is Av (you select the aperture and ISO) closely followed by M (you select all parameters). I suggest you start with these.
Photoshop tutorials
i think that everyone knows the youtube tutorials (rather than to post those i've put a videobar)
and i will recommend some sites that i visit for documentation
Tutorialized i think it's the biggest source of tutorials on the net (from photoshop to 3d studio max)
from the category blog/site with something interesting to check out...
Trimoon This is a place of interesting things such as photography and things of an artistic nature. Not unlike the junk drawer in your kitchen, full of things you may need someday.
PSDTUTS (ce nume are si asta :P) PSDtuts is a blog/photoshop site made to house and showcase some of the best Photoshop tutorials around. We publish tutorials that not only produce great graphics and effects, but explain in a friendly, approachable manner.
Luxa is a social learning site for Photoshop artists providing new tutorials and design articles, as voted and suggested by your fellow users.
Photoshop Essentials Here, you'll find our complete list of Photoshop tutorials covering the basics of Photoshop, all written with beginner Photoshop users in mind, with an easy to follow, step-by-step approach. While most of the Photoshop tutorials listed here were written using Photoshop CS2, they can be completed using any recent version of Photoshop, including Photoshop 7, CS and CS3.
PST Mission: To create a friendly, community supported site dedicated to helping users of all skill levels get the most out of Adobe Photoshop.
9tutorials
from the forum category we have...
Canon Digital Photography Forums This is a forum for digital camera enthusiasts using Canon cameras. The forums contain also general photography and technique discussion areas which are not camera-type specific.
Fototarget amateur photography community
Exposure, Shutter Speed and Aperture Made Simple
Exposure is one of the most important photography concepts to learn, but it is also one which strikes fear into the hearts of even the most intrepid photographer - after all, it all sounds so... technical! As it turns out, exposure is actually a very simple thing to grasp and, once you do, it allows you so much more control over your photos that you'll wonder how you ever lived without it.
Exposure
Exposure is simply the amount of light that reaches our camera's sensor or film. Like Goldie Locks and her porridge, we're looking to capture just the right amount of light to show off all the details of our scene. Too much light and we end up with an overexposed photo; too little and it comes out dark and underexposed.
So how do we control exposure? By using two basic camera properties - the shutter speed and the lens aperture diameter.
Shutter Speed
Shutter speed is a measure of how long the camera's shutter is open for. A fast shutter speed might be around 1/1000th of a second, while a slow shutter speed can be up to several seconds or longer. Plus of course you can have anything in between.The longer the shutter is open for, the slower the shutter speed, and the more light we capture.
Aperture Diameter
This is perhaps the most daunting camera setting, but it's actually very simple. The aperture is an opening within the camera's lens that can get wider or narrower. A wide aperture allows more light through in a given amount of time than a narrow one.
Aperture is measured by an 'f-number'. Somewhat confusingly, a small f-number (e.g. f2.0) means we have a wide aperture, which will let in more light. A large f-number (say f32) means we have a narrow aperture, letting in less light.
Combining Shutter Speed and Aperture Diameter for a Perfect Exposure
By now you can probably see that there are many combinations of shutter speed and aperture diameter that will give us our desired exposure. For example we could use a fast shutter speed and a wide aperture, or a slower shutter speed and a narrow aperture, and still let in the same amount of light, giving us the same exposure.
The exact settings you use depend on the situation and the effect you want to achieve.
If you are photographing a fast-moving object like a car, then you'll need to use a fast shutter speed to prevent it coming out blurred. For this you'll need a wide aperture to let in enough light in the short space of time the shutter is open for.
If on the other hand you want to maximize your scene's depth of field, you'll need to use a narrow aperture, which will necessitate a slower shutter speed.
The key to finding the best shutter speed and aperture diameter settings for your scene is to experiment with several different combinations. Each will give your scene a unique 'feel', and you'd be surprised at the amount of times the 'wrong' settings will produce the best photo.
By: Pete G Williams
Photoshop® Top Secret™ free download
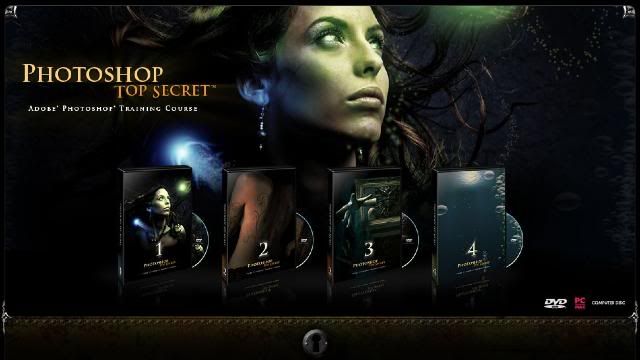
I found this great turorial.
How to Become a Photoshop "Black Belt"-Fast!Just released by Mark Monciardini, Photoshop Top Secret is an Extreme Training Course that teaches you, step by step, how to create cutting-edge graphics and special effects with Adobe Photoshop. This student-friendly home study course includes four DVD-ROMs with over 16 gigabytes of video tutorials and project files. It also comes with a full-color gallery book (printed, not pdf) that shows the end result of each project in the course. You can look, learn, practice, and master these advanced techniques wherever you may be, without the need for expensive classes or tutors. Create Posters, Movie Covers, Surreal Graphics and More!The course will teach you how to become the ultimate Photoshop "black belt" for fun and/or profit. You'll learn how to create top-level special effects for eye-catching movie posters, album covers, book jackets, brochures, mailing pieces, magazine covers, article illustrations, and a tremendously wide range of print ads and Web site graphics.
http://www.photoshoptopsecret.com/

Movie Poster I
Create a popular people montage seen on many movie posters.
LINK:
http://rapidshare.com/users/LA462P
Movie Poster II
Take an ordinary house and turn it into a Sci-fi Movie Poster.
LINK:
http://rapidshare.com/files/50401418/Movie_Poster_II.part1.rar
http://rapidshare.com/files/50401400/Movie_Poster_II.part2.rar
http://rapidshare.com/files/50401624/Movie_Poster_II.part3.rar
http://rapidshare.com/files/50401409/Movie_Poster_II.part4.rar
Movie Poster Credits
Tips and tricks on creating a real “Credit Block” for movie posters.
LINK:
http://rapidshare.com/files/50401376/Movie_Credits.part1.rar
http://rapidshare.com/files/50401383/Movie_Credits.part2.rar
http://rapidshare.com/files/50401535/Movie_Credits.part3.rar
http://rapidshare.com/files/50401285/Movie_Credits.part4.rar
Dark Faces
How I created my creepy Image that has been in Magazines and Ads.
LINK:
http://rapidshare.com/files/50401428/Dark_Faces.rar
Breaking Apart
Create the illusion that a face is falling apart.
LINK:
http://rapidshare.com/files/50402466/Break_Apart.part1.rar
http://rapidshare.com/files/50401560/Break_Apart.part2.rar
http://rapidshare.com/files/50401508/Break_Apart.part3.rar
http://rapidshare.com/files/50401311/Break_Apart.part4.rar
Dream Scene Montage
Create an elephant with wings and place it into a futuristic world.
LINK:
http://rapidshare.com/files/50401529/Dream_SceneMontage.part1.rar
http://rapidshare.com/files/50401668/Dream_SceneMontage.part2.rar
http://rapidshare.com/files/50401563/Dream_SceneMontage.part3.rar
http://rapidshare.com/files/50401278/Dream_SceneMontage.part4.rar
Stone Portrait
Create a “Stone Bust” out of a portrait for a killer special effect.
LINK:
http://rapidshare.com/files/50401623/Stone_Portrait.part1.rar
http://rapidshare.com/files/50401697/Stone_Portrait.part2.rar
http://rapidshare.com/files/50401886/Stone_Portrait.part3.rar
http://rapidshare.com/files/50401673/Stone_Portrait.part4.rar
http://rapidshare.com/files/50401756/Stone_Portrait.part5.rar
Surreal Mist
Create a creamy foggy mist over water and rocks.
LINK:
http://rapidshare.com/files/50401540/Surreal_Mist.part1.rar
http://rapidshare.com/files/50401544/Surreal_Mist.part2.rar
http://rapidshare.com/files/50401580/Surreal_Mist.part3.rar
http://rapidshare.com/files/50401331/Surreal_Mist.part4.rar
Dream Skin
Create a fantasy woman with henna art and dream skin.
LINK:
http://rapidshare.com/files/50401589/Dream_Skin.part1.rar
http://rapidshare.com/files/50401759/Dream_Skin.part2.rar
http://rapidshare.com/files/50401429/Dream_Skin.part3.rar
http://rapidshare.com/files/50401323/Dream_Skin.part4.rar
Special Effects
Learn How to create Orbs, Fireballs and Jellyfish like creatures.
LINK:
http://rapidshare.com/files/50401314/Special_Effects.part1.rar
http://rapidshare.com/files/50401431/Special_Effects.part2.rar
http://rapidshare.com/files/50401417/Special_Effects.part3.rar
http://rapidshare.com/files/50401340/Special_Effects.part4.rar
http://rapidshare.com/files/50401318/Special_Effects.part5.rar
http://rapidshare.com/files/50401320/Special_Effects.part6.rar
http://rapidshare.com/files/50401415/Special_Effects.part7.rar
http://rapidshare.com/files/50401328/Special_Effects.part8.rar
http://rapidshare.com/files/50401308/Special_Effects.part9.rar

Swapping Faces
How to take the face from one photo and place it into a completely different one.
LINK:
http://rapidshare.com/files/51023966/01_Intro.mov
http://rapidshare.com/files/51028936/02_Getting_Started.mov
http://rapidshare.com/files/51030721/03_Matching_Skin_Tones.mov
http://rapidshare.com/files/51032577/04_Face_Shadow_Secrets.mov
http://rapidshare.com/files/51035325/05_Skin_Matching_Secrets.mov
Pop Art
Turn a Photograph into artwork that was popular in the mid 1950’s.
LINK:
http://rapidshare.com/files/50496722/Pop_Art.part1.rar
http://rapidshare.com/files/50492866/Pop_Art.part2.rar
Applying Tattoos
How to apply henna and tattoos to skin.
LINK:
http://rapidshare.com/files/50481136/Applying_Tattoo_s.part1.rar
http://rapidshare.com/files/50483392/Applying_Tattoo_s.part2.rar
Masking Fur
Seamlessly remove the background from furry animals.
LINK:
http://rapidshare.com/files/50485223/Masking_Fur.part1.rar
http://rapidshare.com/files/50487518/Masking_Fur.part2.rar
http://rapidshare.com/files/50489816/Masking_Fur.part3.rar
Vanishing Point
What Vanishing Point is and how to edit images with perspective.
LINK:
http://rapidshare.com/files/50507223/Vanishing_Point.part1.rar
http://rapidshare.com/files/50511659/Vanishing_Point.part2.rar
Web Graphics
Learn how to create commonly used web graphics and screen shots.
LINK:
http://rapidshare.com/files/50520851/Elegant_Headers.rar
http://rapidshare.com/files/50526991/Logo_Basics.rar
http://rapidshare.com/files/50532499/Download_Button.rar
http://rapidshare.com/files/50543201/Seal_of_Guarantee.rar
http://rapidshare.com/files/50552172/Screen_Captures__PC_.rar
http://rapidshare.com/files/50545451/Screen_Captures__Mac_.rar
http://rapidshare.com/files/50549863/Subscribe_Button.rar
http://rapidshare.com/files/50558175/Order_Button.rar
http://rapidshare.com/files/50559384/Computer_Screen_Images.rar
Shattered Type
Create the illusion that text is being shattered like glass.
LINK:
http://rapidshare.com/files/50500038/Shattered_Type.part1.rar
http://rapidshare.com/files/50503596/Shattered_Type.part2.rar
Flower Greeting Card
Use the vector tools in Photoshop to create an elegant looking Greeting Card.
LINK:
http://rapidshare.com/files/50468558/Flower_Greeting_Card.part1.rar
http://rapidshare.com/files/50475456/Flower_Greeting_Card.part2.rar
http://rapidshare.com/files/50470571/Flower_Greeting_Card.part3.rar
Creating DVD Covers
Mark shows you exactly how he created the Photoshop Top Secret DVD covers.
LINK:
http://rapidshare.com/files/50479036/Creating_DVD_Cover_s.part1.rar
http://rapidshare.com/files/50477320/Creating_DVD_Cover_s.part2.rar

Flying out of Bounds
Create the classic “out of bounds” effect with a very cool masking trick.
LINK:
http://rapidshare.com/files/53854880/-__Feersum__-FlyingOOB.part1.rar
http://rapidshare.com/files/53858779/-__Feersum__-FlyingOOB.part2.rar
http://rapidshare.com/files/53851192/-__Feersum__-FlyingOOB.part3.rar
Reaching out of Bounds
Creating the illusion of arms and hands reaching out of a picture frame.
LINK:
http://rapidshare.com/files/51278203/Reaching_Out_of_Bounds.part1.rar
http://rapidshare.com/files/51282073/Reaching_Out_of_Bounds.part2.rar
Chocolate Milk Frog
How to make a frog covered in chocolate.
LINK:
http://rapidshare.com/files/51090808/Chocolate_Milk_Frog.part1.rar
http://rapidshare.com/files/51093773/Chocolate_Milk_Frog.part2.rar
http://rapidshare.com/files/51098112/Chocolate_Milk_Frog.part3.rar
http://rapidshare.com/files/51100483/Chocolate_Milk_Frog.part4.rar
http://rapidshare.com/files/51104392/Chocolate_Milk_Frog.part5.rar
Covered with Wax
Choose an object and cover it with melting wax.
LINK:
http://rapidshare.com/files/51106691/Covered_With_Wax.part1.rar
http://rapidshare.com/files/51109790/Covered_With_Wax.part2.rar
http://rapidshare.com/files/51112318/Covered_With_Wax.part3.rar
Grunge Look
Create a unique grunge background that can be used for almost anything.
LINK:
http://rapidshare.com/files/51192260/The_Grunge_Look.part1.rar
http://rapidshare.com/files/51196157/The_Grunge_Look.part2.rar
http://rapidshare.com/files/51200111/The_Grunge_Look.part3.rar
Square Fruit
Play with mother nature by changing the shape of fruit.
LINK:
http://rapidshare.com/files/51287450/Square_Fruit.part1.rar
http://rapidshare.com/files/51291484/Square_Fruit.part2.rar http://rapidshare.com/files/51718794/Square_Fruit.part3.rar
Invisible Man
How to make a person vanish from their clothing.
LINK:
http://rapidshare.com/files/51205433/Invisible_Man.part1.rar
http://rapidshare.com/files/51210895/Invisible_Man.part2.rar
http://rapidshare.com/files/51216175/Invisible_Man.part3.rar
Metal Collage
How to create a Robot with pieces of a Photo and then place it into another world.
LINK:
http://rapidshare.com/files/51223497/Metal_Collage.part1.rar
http://rapidshare.com/files/51228285/Metal_Collage.part2.rar
Morphing Creatures
Morph animals and reptiles together to create interesting creatures.
LINK:
http://rapidshare.com/files/51252979/Morphing_Creatures.part1.rar
http://rapidshare.com/files/51259915/Morphing_Creatures.part2.rar
http://rapidshare.com/files/51264571/Morphing_Creatures.part3.rar
http://rapidshare.com/files/51272001/Morphing_Creatures.part4.rar
Using Layer Comps
How to create multiple layouts in one Photoshop file using Layer Comps.
LINK:
http://rapidshare.com/files/51219597/Layer_Comps.part1.rar

Vector Art Portrait
Turn a Photograph into beautiful vector art.
LINK:
http://rapidshare.com/files/51851146/Vector_Art_Portrait.part1.rar
http://rapidshare.com/files/51856684/Vector_Art_Portrait.part2.rar
http://rapidshare.com/files/51865053/Vector_Art_Portrait.part3.rar
http://rapidshare.com/files/51877688/Vector_Art_Portrait.part4.rar
http://rapidshare.com/files/51887762/Vector_Art_Portrait.part5.rar
http://rapidshare.com/files/51895918/Vector_Art_Portrait.part6.rar
Dreamy Background
Create Sci-fi looking spiral backgrounds.
LINK:
http://rapidshare.com/files/51748767/Dreamy_Backgrounds.part1.rar
Liquid Metal
The ultimate Liquid metal technique that can be applied to text and objects.
LINK:
http://rapidshare.com/files/51751193/Liquid_Metal.part1.rar
http://rapidshare.com/files/51755087/Liquid_Metal.part2.rar
http://rapidshare.com/files/51758424/Liquid_Metal.part3.rar
http://rapidshare.com/files/51759757/Liquid_Metal.part4.rar
Smoke
Create Psychedelic and Natural Smoke to incorporate into your artwork.
LINK:
http://rapidshare.com/files/51776133/Smoke.part1.rar
http://rapidshare.com/files/51780548/Smoke.part2.rar
Soap Bubbles
Use soap bubbles to add flair to your projects.
LINK:
http://rapidshare.com/files/51784928/Soap_Bubbles.part1.rar
http://rapidshare.com/files/51791004/Soap_Bubbles.part2.rar
Water Bubbles
Use these water bubbles to infuse imagination into your projects.
LINK:
http://rapidshare.com/files/51909867/Water_Bubbles.part1.rar
Underwater Scene
Create an underwater illusion with just the tools in Photoshop.
LINK:
http://rapidshare.com/files/51846287/Underwater_Scene.part1.rar
Swap Animal Skin
Take skin from one animal and place it over another.
LINK:
http://rapidshare.com/files/51836472/Swap_Animal_Skin.part1.rar
Stylized Character
Turn a sketch into colorful art.
LINK:
http://rapidshare.com/files/51796685/Stylized_Character.part1.rar
http://rapidshare.com/files/51804210/Stylized_Character.part2.rar
http://rapidshare.com/files/51815699/Stylized_Character.part3.rar
http://rapidshare.com/files/51825512/Stylized_Character.part4.rar
Masking Mastery
Special video that explains many masking techniques used by the pros.
LINK:
http://rapidshare.com/files/51762273/Masking_Mastery.part1.rar
http://rapidshare.com/files/51766415/Masking_Mastery.part2.rar
http://rapidshare.com/files/51768184/Masking_Mastery.part3.rar
http://rapidshare.com/files/51770219/Masking_Mastery.part4.rar
--------------------------------------------------------------------------------------------------------------------------------
Project Files/Exercise Files
DVD 1
LINK:
http://rapidshare.com/files/50566319/Project_Files.part01.rar
http://rapidshare.com/files/50572676/Project_Files.part02.rar
http://rapidshare.com/files/50584119/Project_Files.part03.rar
http://rapidshare.com/files/50591357/Project_Files.part04.rar
http://rapidshare.com/files/50598245/Project_Files.part05.rar
http://rapidshare.com/files/50606188/Project_Files.part06.rar
http://rapidshare.com/files/50608594/Project_Files.part07.rar
DVD 2
LINK:
http://rapidshare.com/files/53264692/-__Feersum__-PSec-2-Proj.part1.rar
http://rapidshare.com/files/53265853/-__Feersum__-PSec-2-Proj.part2.rar
DVD 3
LINK:
http://rapidshare.com/files/51180564/Project_Files.part1.rar
http://rapidshare.com/files/51184147/Project_Files.part2.rar
http://rapidshare.com/files/51187840/Project_Files.part3.rar
DVD 4
LINK:
http://rapidshare.com/files/51730477/Project_Files.part1.rar
http://rapidshare.com/files/51734240/Project_Files.part2.rar
http://rapidshare.com/files/51736922/Project_Files.part3.rar
Theirs also a Gallerybook included
Download:
LINK:
http://rapidshare.com/files/50616998/DVD_Covers_and_Labels.zip
http://rapidshare.com/files/50612698/Photoshop_TopSecret_Gallery_Book.pdf.zip
Torrents If Interested
http://rapidshare.com/files/49495944/Photoshop_Torrents.zip
The links work for now so download before they remove them
Subscribe to:
Posts (Atom)
